
Make Flask (Sand Mold Box)
a. Cut eight 10" sections of 2x2 lumberb. Cut eight 6" sections of 2x2 lumber
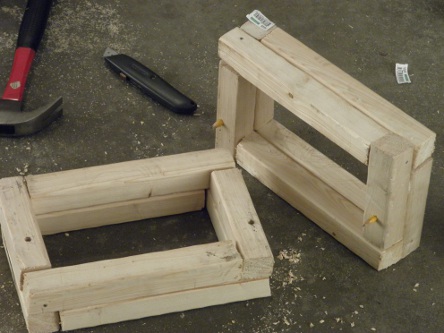
c. Construct two frames using two 10" sections and two 6" sections for each frame (glue and nail with 8D finish nails)
d. Stack one frame on top of the other and align the edges.
e. Drill a hole (19/64") through the top frame into the bottom frame.
f. Insert a sharpened pencil into the hole until the pencil extends into the bottom frame just past the sharpened tip. The pencil should fit snuggly in the hole. If the pencil does not have a tight fit drill a new hole with a smaller bit. Extra holes will not affect the function of the flask as long as the correct holes are used when the flask is used for making the green sand mold.
g. Cut the pencil flush to the top frame
h. Repeat the process of drilling and pencil insertion at a second location (far away from the first)
i. Now that the pencil parts are installed to provide alignment between the two frames a second row of 2x2 boards should be glued and nailed to each of the frames that were just aligned to each other. Overlap the seams (like in a brick wall) when attaching the additional boards to the frames.
YouTube Video: Flask (Link to video at time for this step)
Make Crucible
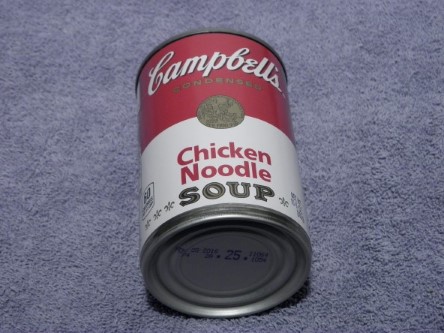
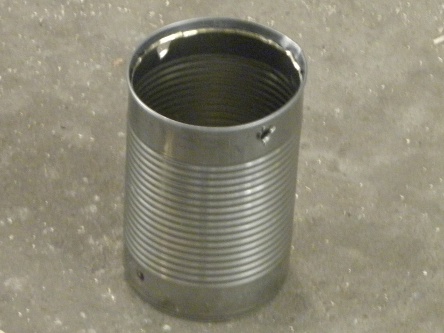
a. Start with a soup can. The kind with no seam at the bottom like the Campbell's soup can shown in the top picture.b. Punch or drill two holes through opposite sides near the top of the soup can. I used a 16D common nail to punch the holes.
c. (Optional) Use a pliers to crush the inside lip of the can making the inside more smooth.
YouTube Video: Crucible (Link to video at time for this step)

Make Crucible Handling Hoop
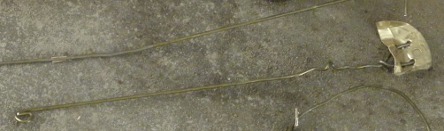
a. Form 1/2 of a wire hanger into a rod with a loop on the end. The loop should fit loosely around the soup can.YouTube Video: Handling Hoop (Link to video at time for this step)
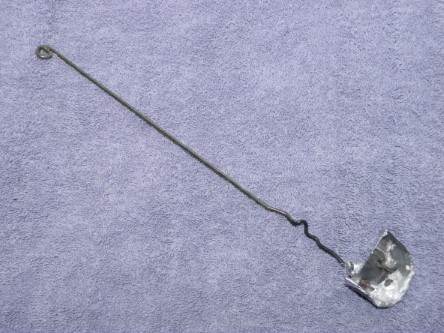
Make Skimmer
a. Fold the soup can lid (cover) in half, forming a half circle.b. Punch 4 holes in the folded soup can lid and weave the remaining wire (from the hanger used to make the hoop for the previous part) through the holes forming a wire stick with a half circle of metal (the soup can lid) on the end. This skimmer tool will be used to scrape impurities off of the top of the molten aluminum in the crucible.
YouTube Video: Skimmer (Link to video at time for this step)
YouTube Video: Skimmer Handle (Link to video at time for this step)
Make Crucible Handling Hook
a. Form a second hanger into a squared off "U" shape with outward facing hooks on each end of the "U" shape. The width of the "U" shape should be wide enough for your hand to fit inside the "U" with gloves on.YouTube Video: Handling Hook (Link to video at time for this step)
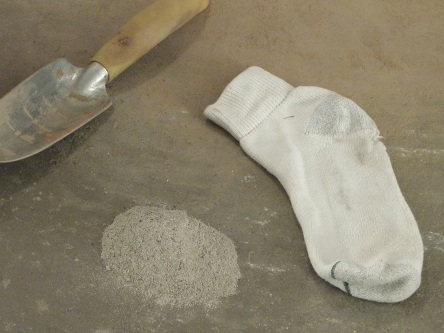
Make Parting Dust
I use charcoal ash as parting dust. I occasionally collect the ash that is left over after I melt aluminum for this purpose. Obtaining charcoal ash (i.e. burning charcoal just for the ash) for your first melt may be more work than it is worth. For your first casting you can use corn starch, talcum powder or dry fine sand as parting dust.YouTube Video: Parting Dust (Link to video at time for this step)
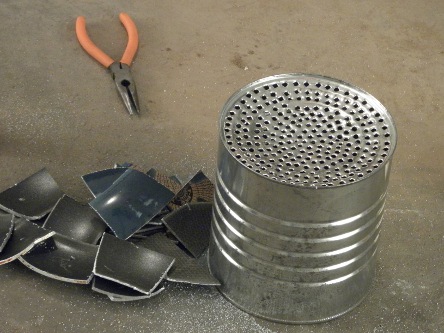
Make Furnace
The furnace is just the coffee can with holes punched in the bottom. I used a nail (16D common nail) to pop the hole in the can. I started from the middle and worked my way to the edge in a spiral pattern. Punching the holes from middle to outside makes sure you have good support when you are punching the holes in the middle of the can. Otherwise you might get excessive bending/deformation in the bottom of the can.YouTube Video: Furnace (Link to video at time for this step)
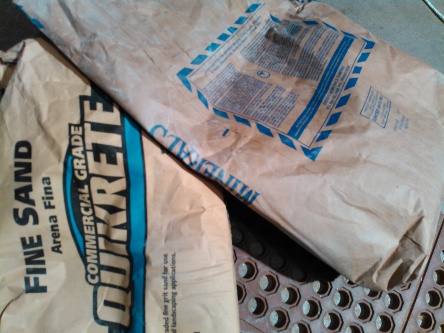
Make Molding Sand (Green Sand)
4 parts sand1 part fire clay (for fire clay I used Hawthorn-50 fire clay from Continental Clay)
Water (as required to make the mixture stick together when compacted)
YouTube Video: Molding Sand (Link to video at time for this step) )
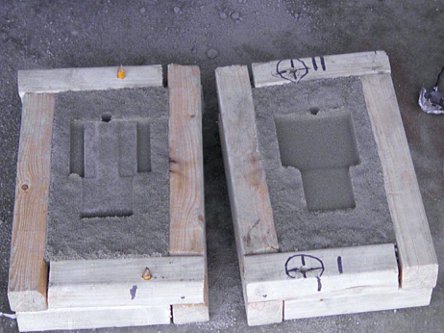
Make Green Sand Mold
Create a green sand mold using a pattern of the part to be made.YouTube Video: Sand Mold (Link to video at time for this step)

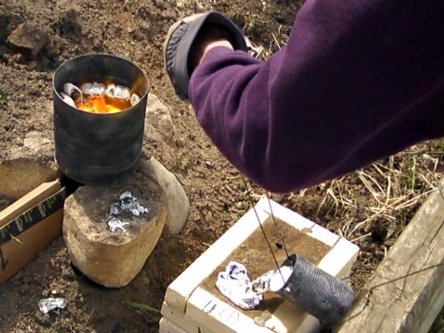
Start the Furnace and Melt Aluminum
a. Put a single layer of charcoal in the bottom of the coffee can.b. Set the soup can on top of the single layer of charcoal.
c. Fill the area around the soup can with charcoal. (up to top of coffee can)
d. Fill the soup can with scrap aluminum to be melted.
e. Place the coffee can on bricks, rocks or a pile of dirt with an opening on one side. (when the coffee can is placed on the pile the opening should form a cave.)
f. Place the hair dryer or other air flow supply at the end of a tube (I formed a tube from a piece of flattened cardboard box) which is directed into the cave under the coffee can. The idea it to get the air flowing through the coffee can.
g. Light the charcoal as you would on a standard charcoal grill.
h. After the charcoal is burning and well established start airflow to the bottom of the can using the hairdryer/blower. (The hair dryer heat should be turned off do it is blowing cool air)
i. The temperature will increase over time. As the aluminum in the soup can melts add more aluminum as required for the size of the part you are casting. Also add charcoal to keep the coffee can filled.
YouTube Video: Furnace Operation (Link to video at time for this step)
Pour Aluminum Into The Sand Mold
** Be aware of the motions you are going to make while handling the molten aluminum. Clear any obstacles between the furnace and flask. The molten aluminum is hot enough to inflict serious injury in the event of any stumble or spill. **
a. Skim the top surface of the aluminum using the skimming tool and discard the wast material on a heat resistant surface (a rock in my case.)
b. Use the handling tools to remove the soup can (crucible) from the furnace (coffee can) and pour the aluminum into the sprue hole. The aluminum should be poured quickly and smoothly. Avoid stopping mid-pour and restarting if possible.
YouTube Video: Aluminum Pour (Link to video at time for this step)
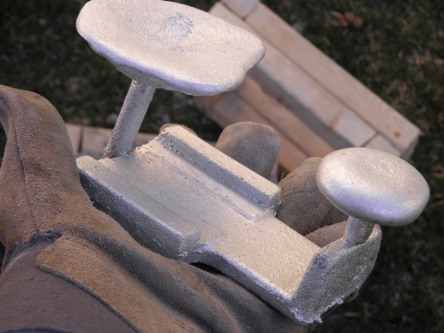
Remove Part From Sand Mold
The part can be removed after waiting for the aluminum to cool and solidify. To be completely safe you can wait for the casting to be cool to the touch before removing it from the sand. For small castings the aluminum will be solid but still hot after a couple of hours. The part can be removed at that time but the part may be hot enough to burn bare skin. Don't remove the casting too soon as it is possible for the exterior of a part to appear hardened while there is still molten aluminum inside.YouTube Video: Remove Part (Link to video at time for this step)