

Friction Welding (with a Dremel Rotary Tool)
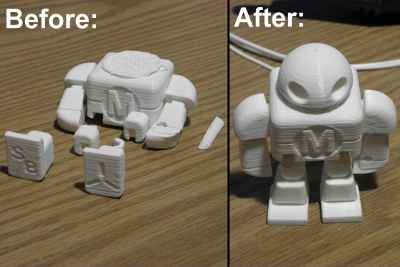
A couple of years ago Fran posted a really interesting video demonstrating friction welding. Fran used a cheap harbor freight rotary tool and some plastic (styrene) rod from a craft store. Her demonstration showed how strong friction welded joints are. Friction welding has been bouncing around the back of my brain ever since. Lately I have found a couple of applications for the friction welding technique. Having recently purchased a fused filament 3D printer (PrintrBot Simple Metal) I have some failed PLA 3D prints laying around. I also happen to have some ABS scraps and some 3mm injection molded ABS rods from another project. Experimenting with these materials I have found that friction welding works well for both ABS and PLA. As part of my experimentation I repaired a failed Maker Faire Makey figure. The following video captures the process. (I have since printed a successful Makey Robot on my Printrbot simple Metal)
After some experimenting with 1.75 mm PLA and 3 mm ABS I have come up with a few friction welding tips:
- 3 mm filament can be used in a standard 1/8 inch collet.
- 1.75 mm filament can be used in a 1/16 inch collet (available at most hardware stores. usually in a set of four Dremel collets )
- You could also use a Dremel chuck to hold the filament if you have one.
- Don’t run the Dremel at full speed. I try to keep the speed as low as I can. If the Dremel tool wants to jump away from the part you are welding increase the speed. (thicker filament requires more speed)
- Don’t let too much filament hang out of the collet. Too muck filament will start to whip around and break off.
- The filament will wear away quickly. Stop to extend more filament before the extended length of filament gets too short to grab and pull out with a pair of pliers. Otherwise the collet nut will need to be completely removed to pull more filament out.
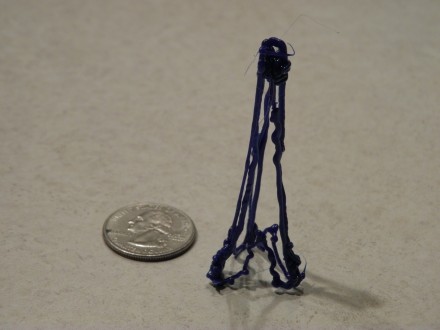
In addition to repairing failed prints friction welding can also be incorporated into the assembly process. Smaller parts can be welded together to form larger structures.
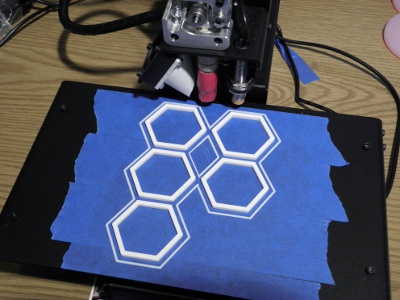
For example I printed 20 hexagons and friction welded them together to form a truncated icosahedron (same shape as a buckyball). In this case the finished part would have fit inside of my printers build volume but the same process could be used to create much larger structures.
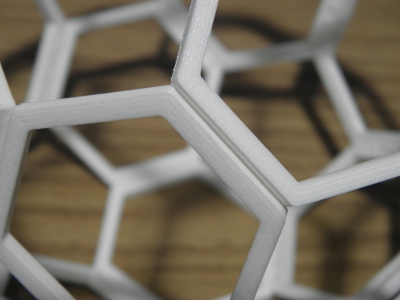
Friction welding is a quick, strong and easy way to join plastic parts together. The great part is that welding the parts together eliminates the need to add additional adhesives keeping the part a homogenous material. Additional structure can even be added if needed for strength. For extra strength prints could even include bevels for strong traditional weld joints.
The files for the truncated icosahedron can be downloaded here:
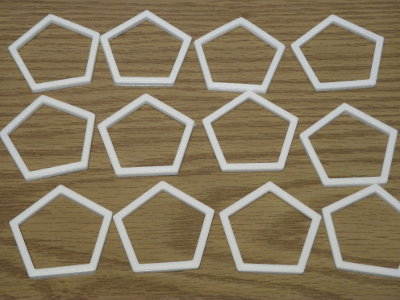
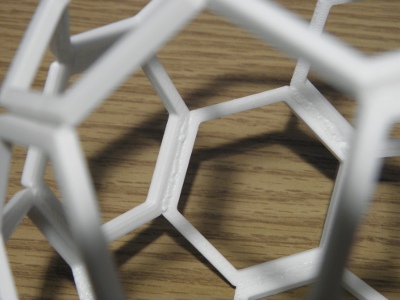
Update 12/26: Why stop there below is a quick GIF of a dodecahedron made from pentagons.