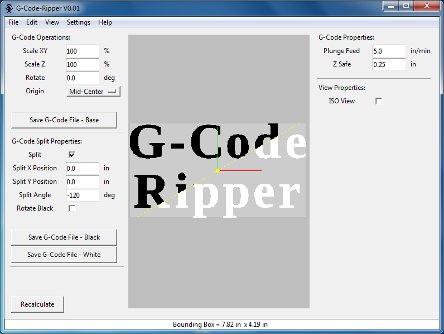
Category Archives: CNC

Prism Shaped Name Plate for Kaitlyn

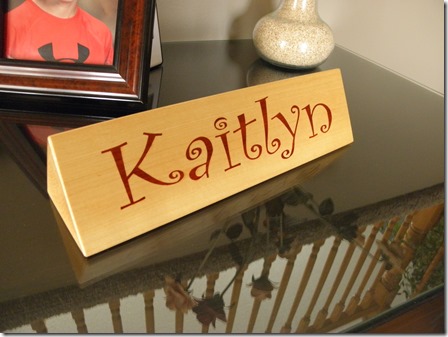
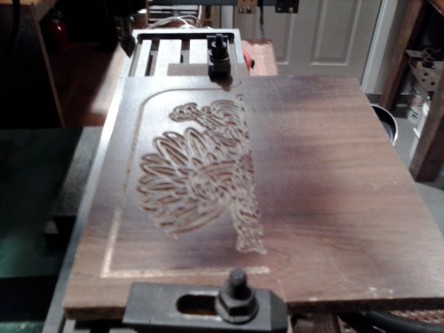
I made a three sided nameplate for my goddaughter Kaitlyn’s 1st birthday.  The main body is basswood and “Kaitlyn” is inlayed on each side of the equilateral triangle.  The inlays were done using the v-carve inlay technique.  Each side has a different font and inlay wood type (walnut, wenge and padauk).  I used F-Engrave to generate the g-code for the inlays.  Below are some pictures of the final product and below I have a few in process pictures.

PB200006

PB200003

PB200004

PB200005

Here are a few in process pictures:

Pre inlay, the name has just been v-carved into the basswood

KIMG0211KIMG0212KIMG0213

Here is one side ready for gluing the wenge inlay wood into the basswood.  I started with a rectangular piece of basswood and when I cut it into the triangular shape I saved the cutoff parts to make a fixture for holding the part while v-carving on each flat side.  I made the fixture by gluing the cutoff parts to a piece of scrap.  You can see the edge of the fixture under the basswood in the picture below.

KIMG0221

Here is the part with all of the inlay parts glued into the basswood.  The last step in the inlay process is removing the excess material from the inlay wood.

KIMG0222

Finally a few close-ups for fun so you can see some of the detail.

PB250001PB250002PB250003

Everything went pretty smoothly except for the padauk side.  Red dust from the padauk spread all over the surface of the basswood while I was sanding the inlayed wood down.  I managed to remove most of the dust and finished by scraping the surface instead of sanding.  If I do a padauk inlay again I might try sealing the surface of the base material to minimize the amount of dust that can get trapped in the base material.

V-Carve Inlays and More with F-engrave 1.50

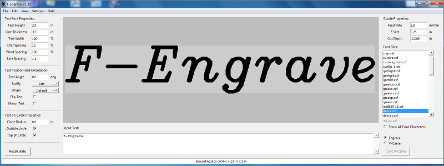
F-Engrave 1.50 has been released and is now available on the F-Engrave page. Here are a few of the highlights from this release:

  •  Modified helper program (ttf2cxf_stream) and F-Engrave interaction with it to better control the line segment approximation of arcs.
  • Added straight cutter support (cutter will follow design inside or outside of lines)
  • Added option to create prismatic cuts (inverse of v-carve).  This option opens the possibility of making v-carve inlays.
  • Added option for radius format g-code arcs when arc fitting.  This will help compatibility with g-code interpreters that are missing support for center format arcs.  (I think GRBL will accept the radius format arcs)

One of the most exciting new things you can do with F-Engrave now is v-carve inlays.  Below is a video I put together showing the process of making an inlay with F-Engrave.

Here is an example of an inlay that i made during testing of the new features.  The eagle is a slightly modified version of an eagle I found on WikiMedia.

eagle_inlay (Custom)

Here are the parts before gluing them together to form the inlay.

KIMG0034 (Custom) KIMG0033 (Custom)

Dmap2Gcode (image to g-code) Update

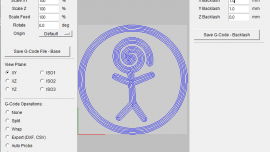
I released a new version of the image to g-code conversion program Dmap2Gcode.  The new version is 0.02, the updates to the program are listed below:

  • Added option to disable arcs in the g-code output (useful for GRBL/ShapeOko compatibility)
  • Fixed bug resulting in the selection of columns then rows having no effect
  • Added automatic scaling of all linear dimensions values when changing between units (in/mm)
  • Fixed bug when using a configuration file (“dmap2gcode.ngc”)

Auto Probing With G-Code Ripper

OLYMPUS DIGITAL CAMERA

When g-code is generated by most software it is assumed that the stock material is flat and level. Sometimes the stock material is warped, not mounted level or was never intended to be flat.  One way to overcome the problem of un-level stock material is to machine a flat area onto the stock material or to invert your thinking and cut only what isn’t the design you want.  An extreme example of the second case is illustrated in the bat I modified for my brother (see the “Man Cave” bat below).

Another approach to dealing with stock material that is not level is to measure the existing geometry and account for the un-level geometry.  This can be a tedious task to perform manually and many programs used to generate g-code for CNC machines have no mechanism for accounting for the out of level condition of the workpiece.

G-Code Ripper‘s solution is to read g-code generated for flat stock and modify the code to include probing of points on the stock material using the CNC machine.  The resulting probe data is used to automatically adjust the tool paths in the g-code file.  The probe points are arranged in a grid pattern and the cut depths over the range of the tool path are determined by Bilinear Interpolation.  G-Code ripper keeps track of which points are needed for calculating the interpolated Z positions for the tool paths.  Probe points that are not required during cutting are not measured during the probing process.  G-Code Ripper allows the tool and the probe to be in different locations, the location of the probe relative to the tool is entered into the probe offsets settings in G-Code Ripper.

Using Auto Probe in G-Code Ripper:

You will need to have a working probe and be running either LinuxCNC or Mach3 as your machine controller.  You don’t need anything fancy for a probe.  simple momentary switch will work just fine in most cases.  I have been using a momentary switch I had in my parts box.  You can see what my setup looks like in the embedded video below.  There is good information for setting up MACH3 and LinuxCNC probes on the Autoleveller site.

Get G-Code Ripper Here: G-Code Ripper

1. Open an existing G-code file (if it open properly the tool path will be shown in the display canvas)

2. Select the Auto Probe option from the radio buttons in the lower left corner of the G-code Ripper Window.

3. Set the options on the right side of the window. (Details for each of the options can be found here G-Code Ripper Manual)

4. Save the G-code file using the button on the right side of the window.

G-Code Ripper HAD Mouse

Background:

The basic operation of G-Code Ripper’s auto probe routine is based on the technique that is used by Autoleveller.  In fact G-Code Ripper even uses the same form of the bilinear interpolation equations.  However, Autoleveller is specifically geared toward creating circuit boards.  Since the circuit board has a conductive surface the probing can be performed using an electrical circuit which includes the cutting tool in the collet and the top of the printed circuit board.  Using the cutting tool as the probe has the advantage of ensuring there is no offset between the probe and the tool.  Autoleveller also assumes the workpiece is very close to flat (Autoleveller uses the first probe point to determine a new zero reference) G-Code ripper does not make any such assumption.

F-Engrave V1.32

F-Engrave

F-Engrave Version 1.32 is now available on the F-Engrave Web Page.  This release includes a few minor items that I have had backlogged for a while.  The items are listed below.

– Added limit to the length of the engraved text included in g-code file comment (to prevent error with long engraved text)

– Changed number of decimal places output when in mm mode to 3 (still 4 places for inches)

– Changed g-code format for G2/G3 arcs to center format arcs (generally preferred format)

-Hard coded G90 and G91.1 into g-code output to make sure the output will be interpreted correctly by g-code interpreters.

My Entry for the Hackaday Logo Contest

OLYMPUS DIGITAL CAMERA

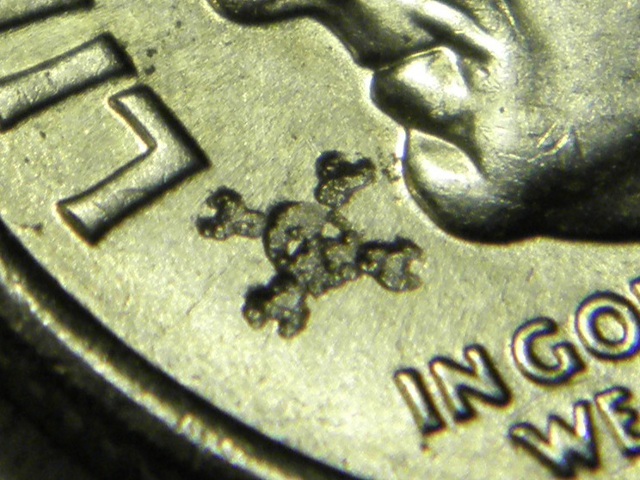
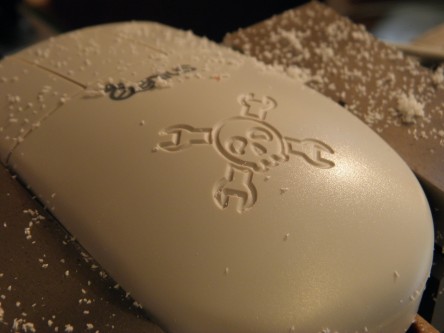
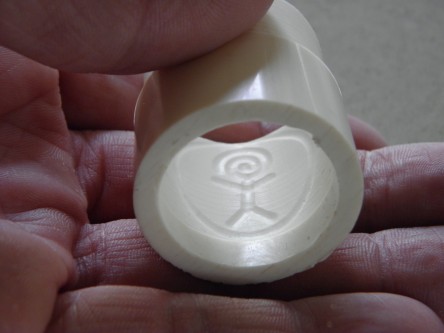
Hackaday is having a contest to see where people can put the Hackaday skull and wrenches logo.  I thought I would take a little time and throw my hat into the ring.  The pictures included in this post are of the logo engraved onto a dime.  The engraved image is .064 inches tall.  The judging criteria is partially based on the size of the logo.  That is to say preference will be given to very large and very small logos.

OLYMPUS DIGITAL CAMERAOLYMPUS DIGITAL CAMERA

My machine has a lot of backlash (about 6% of the image size) so I set it up to cut scan lines in one direction.  Since the machine is always cutting in the same direction the backlash doesn’t show up in the engraving.

The surface of the dime was not flat so I had to make a second pass to cut the right hand side of the image a little deeper (.002 inches).  I used Dmap2gcode to generate the original g-code and I used G-Code Ripper to split the g-code in half so I could cut only the right half of the image on the second pass.


G-Code Wrapping with G-Code Ripper

wrap_g-code_pic

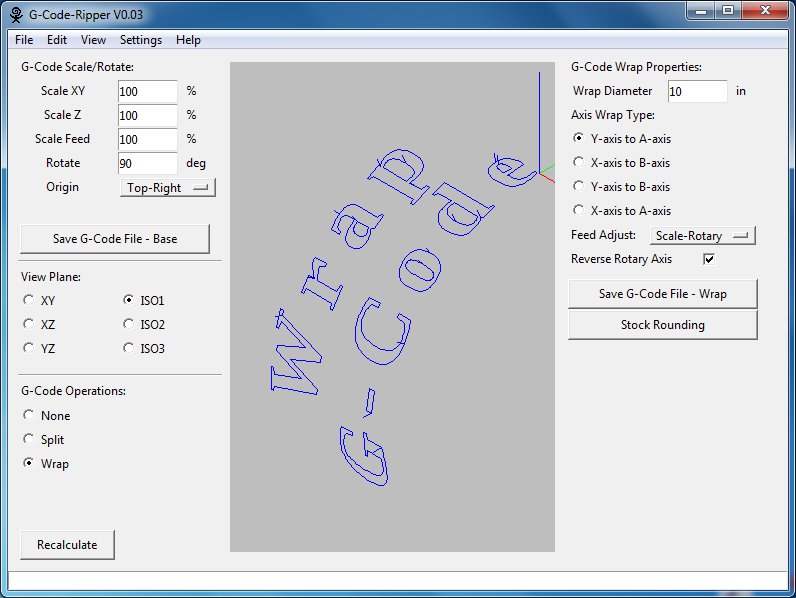
G-Code Ripper version 0.03 has been posted to the G-Code Ripper Homepage.  The new version has more plotting options including more isometric view angles.  The big addition in this version is the ability to map g-code from the X or Y axis to a rotary axis A or B.  This functionality is very similar to CNC wrapper.

G-Code Ripper: G-Code Wrapping Features

  • Graphical preview of the resulting g-code.
  • Automatically maps g-code arcs to linear movements prior to conversion to rotary moves.
  • Options for scaling feed rates to make them compatible with the rotary movements.
  • Interpret g-code variables and equations.
  • G-code Rippers basic features can also be used to scale and rotate the g-code before wrapping the code for the rotary axis.

F-Engrave 1.20 With Extended Character Support

Extended Characters

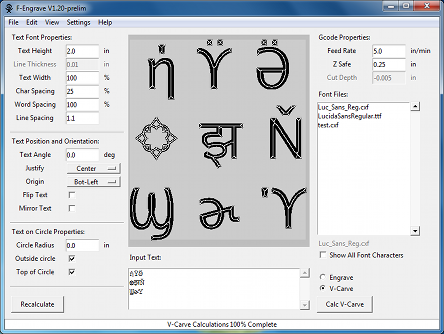
F-Engrave 1.20 with extended character support is now available for download.  To enable extended characters in F-Engrave there is a new setting in “General Settings” named “Extended Characters”.  Of course you will also need a font with the extended characters you want to use.  If you are not using the extended characters it is best to leave extended characters turned off.  Loading all of the characters slows F-Engrave down.

Linux users will need to compile a new ttf2cxf_stream executable to use the extended characters.  The source code for ttf2cxf_stream is available in the source zip file (F-Engrave-1.20_src.zip).  A new windows executable is included in the windows download.


G-Code Ripper Released

G-Code Ripper

I have uploaded the first version of G-Code Ripper (formerly referred to as the g-code splitting program).  G-Code Ripper can read g-code files and scale, rotate, translate and split the g-code data before writing back to another file.  On the G-code Ripper page I posted an example workflow showing one potential use for the software.  With the basic building blocks of reading and interpreting the g-code completed I will be thinking of new features to add to G-Code ripper.

Everything is new in this program so be careful and check the output.