

Laser Power Control in K40 Whisperer with a M3 Nano Controller Board
There are new laser machines being shipped (from Vevor) without potentiometer power control or digital power control on the laser engraving machine. The only way to control the power on these machines (without adding additional hardware) is through the M3 Nano (LASER-M3) controller.
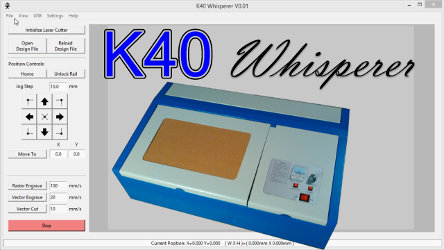
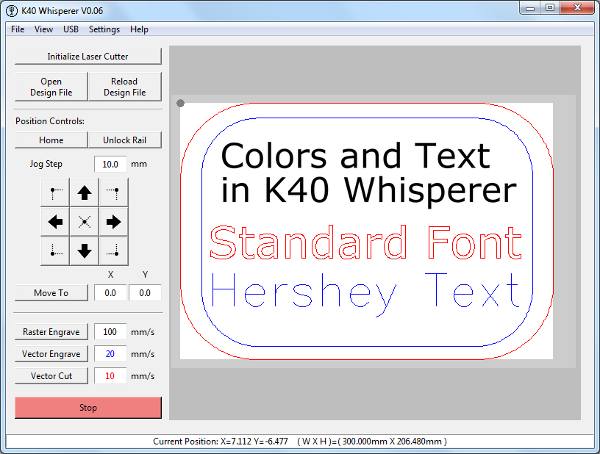
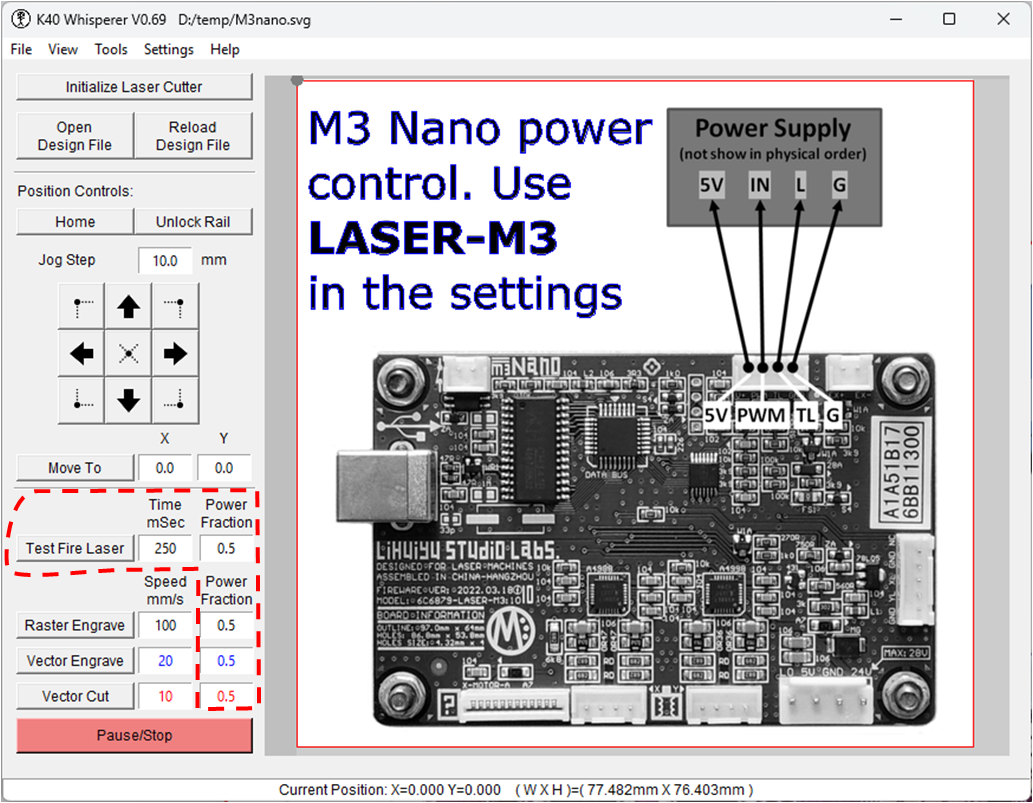
As of Version 0.69 K40 Whisperer is able to control the laser power through an M3 Nano controller. Individual power settings are available for “Raster Engrave” “Vector Engrave” and Vector Cut”. There is also a new “Test Fire Laser” feature for that can set the power and fire the laser for a short test burst. The burst time can be set between 1 millisecond and 9999 milliseconds (10 seconds). Using a time setting of zero sets the power (PWM) level but does not fire the laser. The laser can then be test fired manually using the button on the machine. The new main display is shown below. K40 Whisperer can be downloaded here: K40 Whisperer Download Page
Here are some key points about the new options:
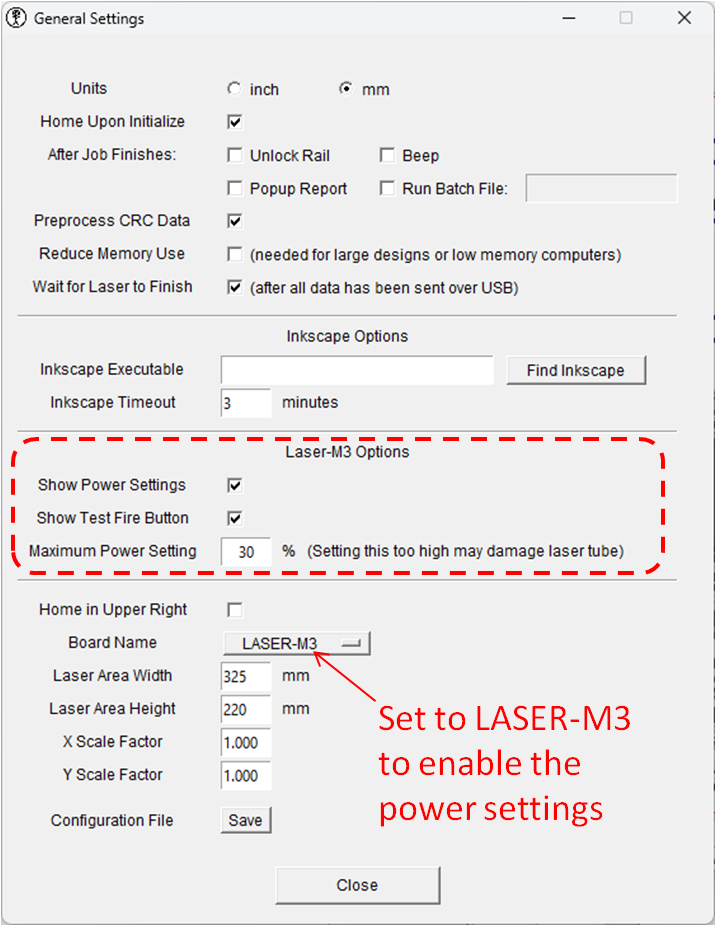
- The new options will only be visible when the LASER-M3 controller board type is selected in the settings window.
- There is a new setting for “Max Power %” in the general settings. The max power setting controls the maximum power that will be sent to your machine. That setting is equivalent to the power setting on machines with a digital display. More info on values for the max power setting (% power on digital controller) can be found here: New to K40: Start Here
- On the main screen the “Power Fraction” setting is a multiplier of the max power setting. So entering .25 for power fraction would result in .25 times the max power. Entering 1.0 would result in the full value of max power.
- In order to use power control from the M3 Nano there needs to be control wiring between the M3 Nano and the laser power supply. The new Vevor lasers include this wiring so nothing needs to be changed. For older machines that may have M3 Nano controllers installed as replacements for a failed M2 Nano will require additional wiring to utilize the power control features of the M3 Nano.
Converting a K40 Laser from Potentiometer Power Control to M3 Nano Power Control
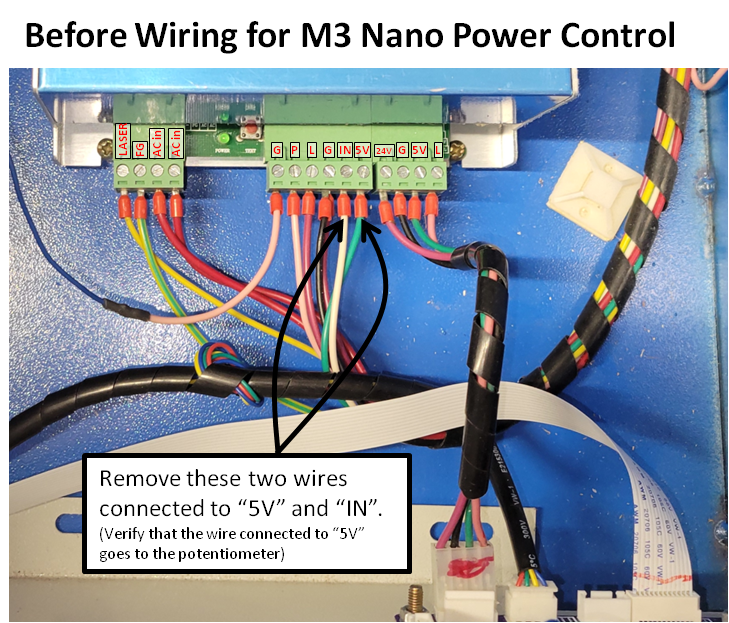
Converting a laser engraver from potentiometer control to M3 Nano control will disable the potentiometer control completely. Here are the steps for converting a K40 Laser from potentiometer power control to M3 Nano Power control:
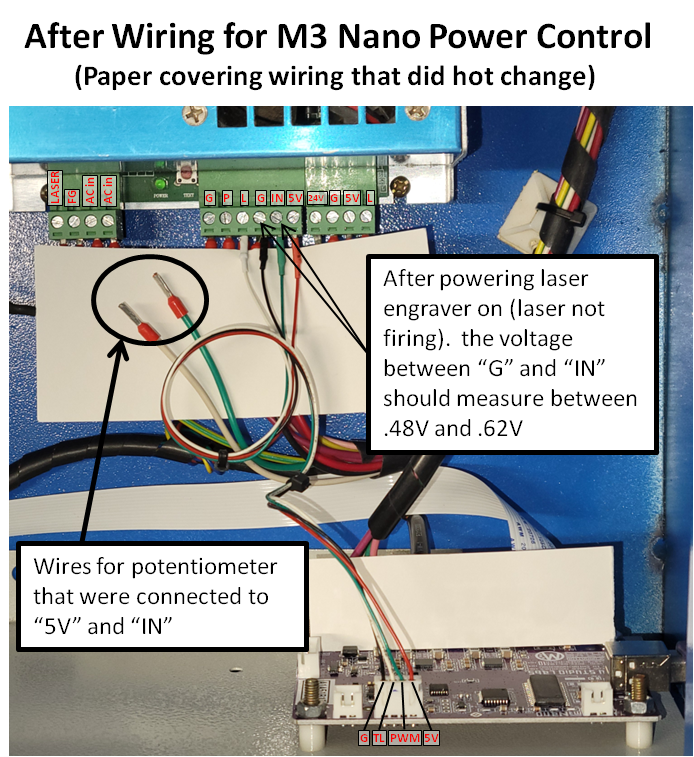
- Disconnect the wire connected to “5V” and “IN” on the power supply that run to the potentiometer on the laser engraver.
- Add wires between the 5V, PWM, TL and Ground connectors on the M3 Nano and the 5V, IN, L and Ground connectors on the power supply respectively (as shown in the After Picture) If you want to get a connector that properly fits the connector on the controller board it is a JST XH 4 pin connector. Jumper wired with female Dupont connectors will fit on the pins but they are a little loose and may disconnect easily. (Warning: if the laser is fired while the connection between the Nano “PWM” pin and the power supply “IN” is disconnected the laser will fire at 100% power. That will degrade/damage the laser tube quickly)
- There should be two wires loose at the end of the process. The wires from the potentiometer that were connected to 5V and IN on the power supply
- A good final check to make sure the M3 Nano is sending a PWM signal to the power supply is to measure the voltage between the “G” (ground) and “IN” connectors after the laser engraver is turned on (the laser should not be firing). The voltage should measure between .48V and .62V. If the measurement is not close to that double check your wiring.